What You Will Need:
A Raw Shooting Camera (see my list of Affordable Raw Shooting Cameras, or The Benefits of Shooting in Raw.)
Part 1.) Taking the photos
This is the most important part of this tutorial, because you're going to need to have more than one version of the same image using various settings on your camera. This is a prime example of one of my free exclusive gimp lessons about "developing your photo-editor vision," that you get for subscribing to my email list.
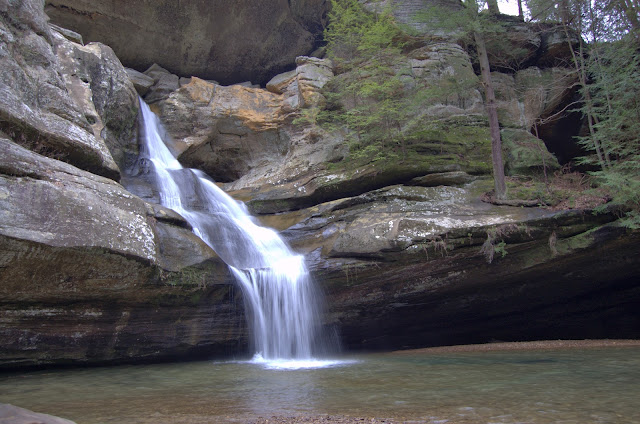
First off, I took my "base photo," focusing on getting the majority of the image to expose. Here is what I did.
- I set my tripod up, and framed in the shot with my camera
- I turned my ISO to the lowest possible setting, and set my camera to shutter priority
- I adjusted the shutter speed down until I got a reasonably good exposure, referring to my histogram for reference
- Once I found a good exposure, I set my camera to fire after 10 seconds, so that I wasn't touching the camera when it fired the shot
 |
| This shot exposed nice, but the waterfall's fast motion made the waterfall blur. |
 |
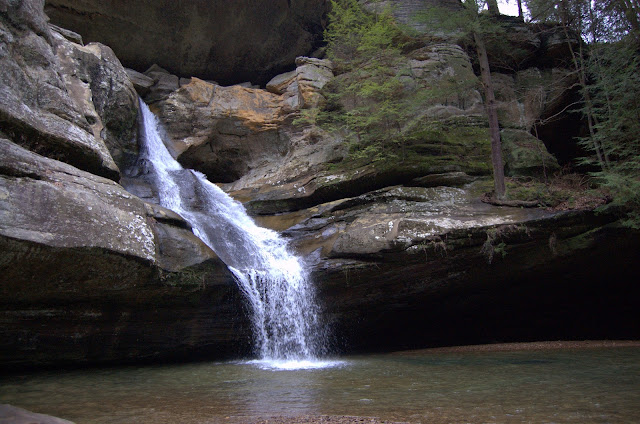
| You can't quite tell in this version, but the higher ISO setting made this image very grainy, but we don't care - all we want is the waterfall. |
The remainder of this lesson is in a gimp video tutorial. Enjoy!
The Nature Hiking Photography Checklist.
Aperture, ISO, and Shutter speed explained.
Layer Masks Explained
The Benefits of Shooting in Raw


RAW files ae digital right ?
ReplyDeleteYep! They sure are!
ReplyDeleteI have a question. I tried to shoot some pictures in RAW and when I opened them in GIMP via UFRaw, they turned out a lot darker than the original image. Do you know why it's doing that and how I can fix it? Thanks so much!
ReplyDeleteWhen you make exposure edits to a photo in UFRaw, it remembers those settings when you open another file. You simply have to reset the settings in UFRaw when you open a file. I hope that makes sense.
DeleteThanks for the quick reply! I thought it was doing that... do you know if there is any way to set everything back to normal? lol. I've moved so much stuff around, I have no idea what the normal setting were and now I can't figure out for the life of me how to get my images to look right. I've tried messing around with every different color option and can't get the pictures to open up in UFRaw looking the same way as it does normally =(
ReplyDeleteTo reset the tool, you have to click on the button that has two blue arrows in it. There are several of these throughout all of the UFRaw tools. Simply click on all of them until your images look normal again. Hope that helps!
DeleteI never even noticed that refresh button lol. I clicked on all of them and set them all back, but my picture is still super dark :( Do you have an email or anywhere where I can post the two pictures to show you the difference between them?
ReplyDeleteLol yeah they're a bit tricky. If you want to contact me directly via email all you have to do is subscribe here: http://www.eepurl.com/gECIH
DeleteThat will get you my free ebook, 5 exclusive lessons, and will put you in direct email contact with me.
thanks! I just subscribed... I'll send you some pics soon!
ReplyDeleteCascade, Love those cascade scene .
ReplyDeleteI like to bath in shower .
ReplyDeleteThis blog is so interesting and impressive. Thanks for the awesome tutorial.
ReplyDeleteI'll immediately snatch your rss as I can not to find your e-mail subscription hyperlink or newsletter service. Do you have any? Please let me understand so that I may subscribe. Thanks.
ReplyDeleteJust want to say your article is as amazing. The clarity in your post is simply great and i can assume you are an expert on this subject. Well with your permission allow me to grab your feed to keep up to date with forthcoming post. Thanks a million and please keep up the enjoyable work.
ReplyDelete